
Installing Existing Certificate in Stoneware
Instructions
1. Copy the existing certificate in .pfx format to a local directory.
2. Copy the existing keystore from Stoneware server to the same local directory. (e.g. \\STONEWARE\c$\stoneware\config\chs.keystore)
3. Download and Install KeyStore Explorer on your workstation [[1]]
4. Open Keystore Explorer and open the existing Stoneware keystore, entering the password.
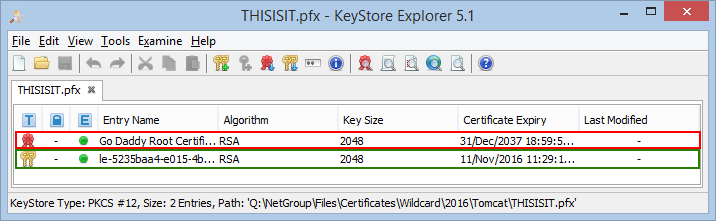
5. (If necessary) Delete the public certificate: Locate and select the public certificate if it exists. (represented by a red certificate and boxed in red in the image below) Right-click and select Delete and Yes.
7. Remove current certificate: Locate and select the key pair and delete it. (represented by two keys and boxed in green in the image below)
8. Import new Key Pair: Tools –> Import Key Pair – Locate and select the new certificate entering the password.
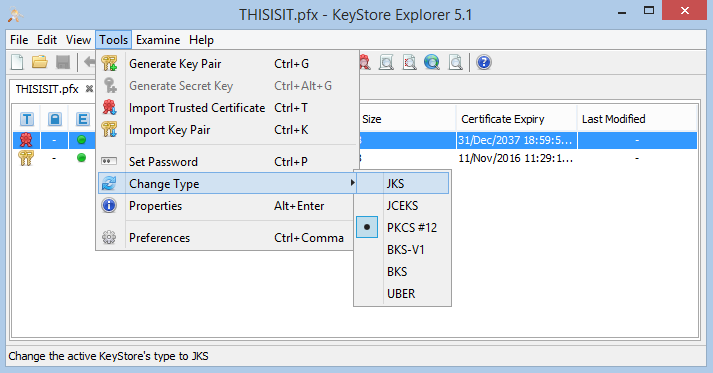
9. Change the file’s format to a Java keystore: Click Tools –> Change Type –> JKS
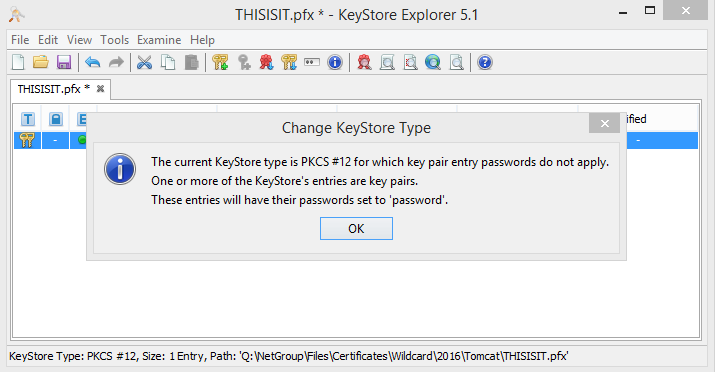
10. (Possible) Notice that the keypair password was changed to ‘password’.
11. Click File –> Save
12. Set the key pair password: Right-click on the key pair and select Set Password. ***(Set it to the webNetwork relayuser password. Currently the almighty CHS password.)***
13. Set the keystore password: Click Tools –> Set Password. ***(Set it to the webNetwork relayuser password. Currently the almighty CHS password.)***
14. Change the key pair’s name: Right-click on the key pair and select Rename. ***(Set it to *.housingservices.com.)
15. Remove the Root Certificate from the certificate chain:Right-click on the key pair –> Edit Certificate Chain. –> Remove Certificate.
NOTE: Modern browsers will incorrectly report the certificate as being a self-signed certificate when the Root Certificate is present in the certificate chain. The browsers prefer to match the Intermediate Certificate to the Root Certificate contained in their certificate store. Each time this process is followed, one certificate will be removed from the chain, starting with the Root Certificate.
16. Click File –> Save
17. Copy the new keystore file (chs.keystore) back to each Stoneware server.
e.g. \\servername\c$\stoneware\config\
★☆★☆ Important Note ★☆★☆
After completing steps 17-20 a reboot must be done for each Stoneware server causing all users to lose connectivity to Stoneware.
18. Open a browser and go to the Server Management Console for each Stoneware server and login. (e.g. https://stoneware.housingservices.com:8090/login.jsp%7Chttps://stoneware.housingservices.com:8090/login.jsp)
19. Click the Wizards tab and click Go on the Import Relay Certificate Wizard.
20. Verify the correct Relay is selected and click Next.
21. Click Save and Restart. Wait for the console to come back up.
22. Verify that the new certificate is in use.